Download the
Paisabazaar app Today!
Paisabazaar app Today!
Get instant access to loans, credit cards, and financial tools — all in one place

Win Assured Cashback

Our Advisors are available 7 days a week, 9:30 am - 6:30 pm to assist you with the best offers or help resolve any queries.


Get instant access to loans, credit cards, and financial tools — all in one place

Scan to download on



 Personal Loan
 Business Loan
 Home Loan
 Other Loans


Our Advisors are available 7 days a week, 9:30 am - 6:30 pm to assist you with the best offers or help resolve any queries.
600 or 750? What's your credit
score? Check for FREE.


Let’s Get Started
 +91
+91
The entered number doesn't seem to be correct
Note: The information on this page may not be update. For latest information, click here.
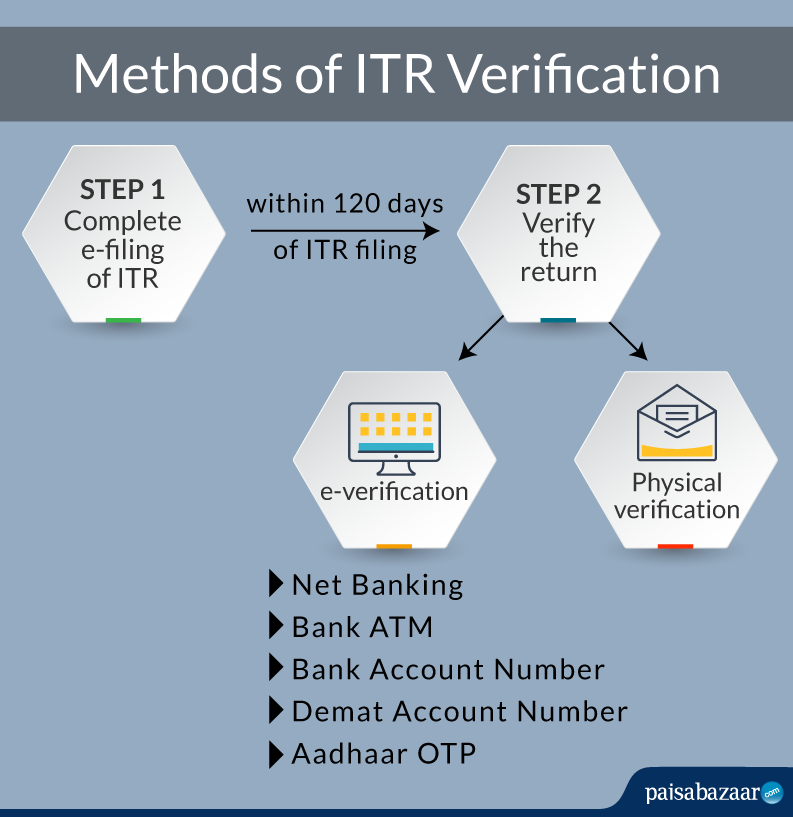
Do you know that just filing your income tax return (ITR) is not enough? You also have to verify your ITR, otherwise your tax filing will be considered invalid. Currently the best way to verify your ITR is the online/electronic method. The e-verification of ITR is not only easy but also time saving. However, there also exists a physical method of ITR verification, where you have to send a copy of ITR-V by post. In the following sections we will discuss the various methods for ITR e-verification and physical verification.
Table of Contents : Steps to Verify Your Tax Return
The ITR filing process comprises 2 key steps:
Get FREE Credit Report from Multiple Credit Bureaus
Check Now

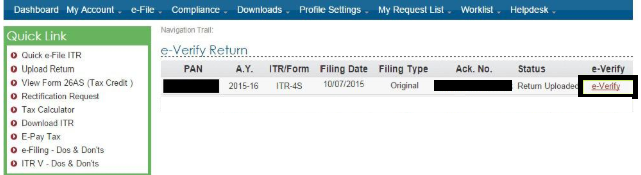
Step 1: Visit the e-filing portal of Income Tax Department and click on “e-Verify Return” under Quick Links.
Step 2: Enter PAN, assessment year and acknowledgement number received at the time of ITR filing.
Step 3: Next, the following web page will be displayed showing the details of the uploaded return. Click e-verify on this page to start the ITR verification process.
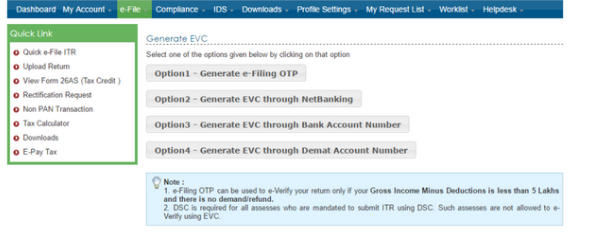
Step 4: Various methods to generate the e-verification code (EVC) will be displayed. Generate EVC using a suitable method.
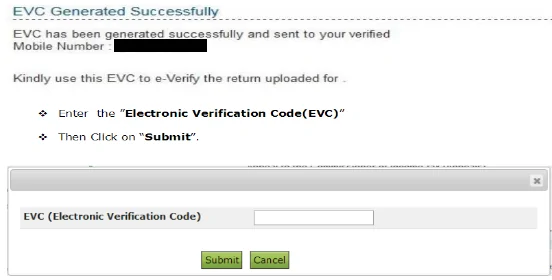
 Step 5: After successfully generating the EVC, enter the code and click submit.
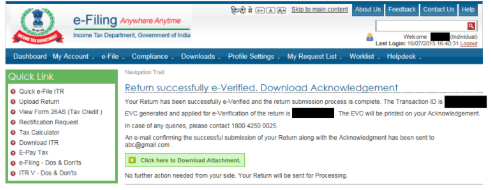
Step 6: The “Return successfully e-verified” message will be displayed with a transaction ID after you submit the EVC. You may download the attachment using the green button for your record.
EVC refers to a 10-digit alphanumeric code, which is required to e-verify your submitted tax return. Please note that if you do not verify your return within 120 days of ITR filing, your ITR submission is invalid. Moreover, one EVC can be used to verify only one return. Thus if you revise a return that is already e-verified, you need to generate a new EVC to e-verify ITR. The following are the various methods to generate EVC required to e-verify ITR.
1. Net-Banking
Step 1: Login to your net banking account.
Step 2: Find the tab related to income tax filing on the home page.
Step 3: Select the e-verify option, which will redirect you to the website of the Income Tax Department.
Step 4: Select the “My Account” tab on the e-filing web page to generate EVC.
Step 5: The EVC will be sent to your registered mobile number and email ID.
Step 6: Use this EVC to e-verify your return.
2. Bank ATM
Step 1: Swipe your debit card at a bank ATM.
Step 2: Select the option of “Generate PIN for e-Filing”.
Step 3: You will receive the EVC on your registered mobile number.
Step 4: Log in to the Income Tax Department e-filing website and select the option “e-verify using Bank ATM”.
Step 5: Enter the EVC to verify your ITR.
Get FREE Credit Report from Multiple Credit Bureaus Check Now
Step 1: Visit the e-filing portal of Income Tax Department and click on “e-Verify Return” under Quick Links.
Step 2: Enter PAN, assessment year and acknowledgement number received at the time of ITR filing.
Step 3: Click e-verify.
Step 4: Various methods to generate the e-verification code (EVC) will be displayed. Click “Option 3- Generate EVC through Bank Account Number”.
Step 5: Following screen will appear to pre-validate your bank account.
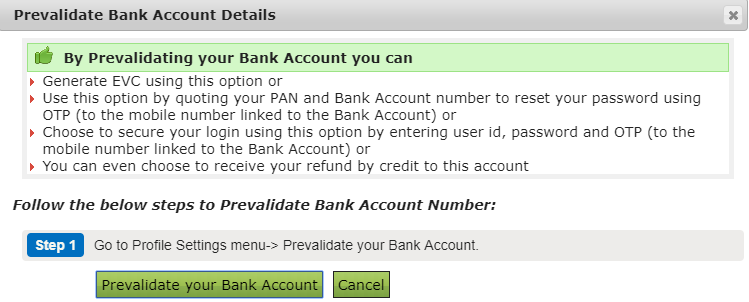
Step 6: Select the bank name, enter IFSC and your registered mobile number. Click on “Prevalidate”
Step 7: After prevalidation of your bank account, following web page will be displayed. Click “Yes” to receive EVC on your registered mobile number by SMS.
Step 8: Now enter this EVC to verify your return and download the attachment after successful e-verification. Please note that this attachment is only for your record and no additional step is required after this.
4. Demat Account Number
Step 1: Log into your Income Tax e-filing account.
Step 2: Click on “Profile Settings” tab in the dashboard view.
Step 3: Click on “Prevalidate Your Demat Account” and the following web page will appear.
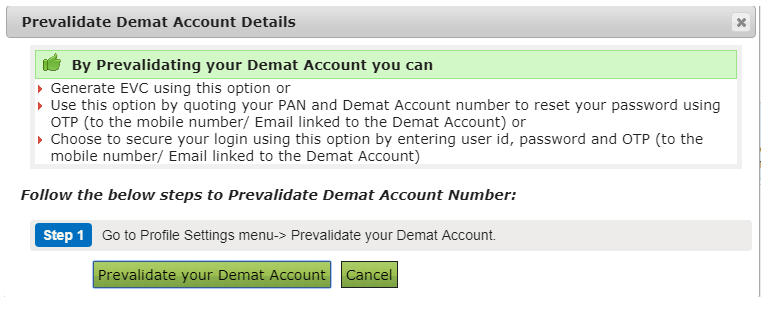 Step 4: Fill out the various mandatory fields such as Depository Type (NSDL/CDSL), DP ID, Client ID, Mobile Number, Email ID and then click on the “Prevalidate” button.
Step 5: After you have clicked the “Prevalidate” button, click yes to receive EVC to your registered mobile number.
Step 6: Use this EVC to verify your return and download the attachment after successful e-verification. Please note that this attachment is only for your record and no additional step is required after this.
Read more : e-verification of ITR using Demat Account.
5. Aadhaar OTP
Step 1: Link your Aadhaar number with your PAN.
Step 2: After you have linked them, go to the Income Tax e-filing website and click on “e-Verify using Aadhaar OTP”.
Step 3: The one-time password (OTP) will be sent to the mobile number linked to your Aadhaar Card.
Step 4: Enter the OTP to e-verify your return. Please note that the OTP is valid for 10 minutes only.
Step 5: You can download the attachment after successful e-verification. Please note that this attachment is only for your record and no additional step is required after this.
Read about how to link Aadhaar with PAN.
Get FREE Credit Report from Multiple Credit Bureaus Check Now
Step 1: Visit the e-filing portal of Income Tax Department and log in.
Step 2: Select “View Returns/Forms” option to see the e-filed returns.
Step 3: Click on the acknowledgement number and select ITR-V/ Acknowledgement to download ITR-V.
Step 4: After downloading the form, enter the password to open the document. The password is your PAN in small letters along with your date of birth.
For example: if your PAN number is ABCDE12345 and your date of birth is 01/12/1985 (dd/mm/yyyy), the password will be “abcde1234501121985”.
Step 5: Take a print out of this form and and sign in blue ink.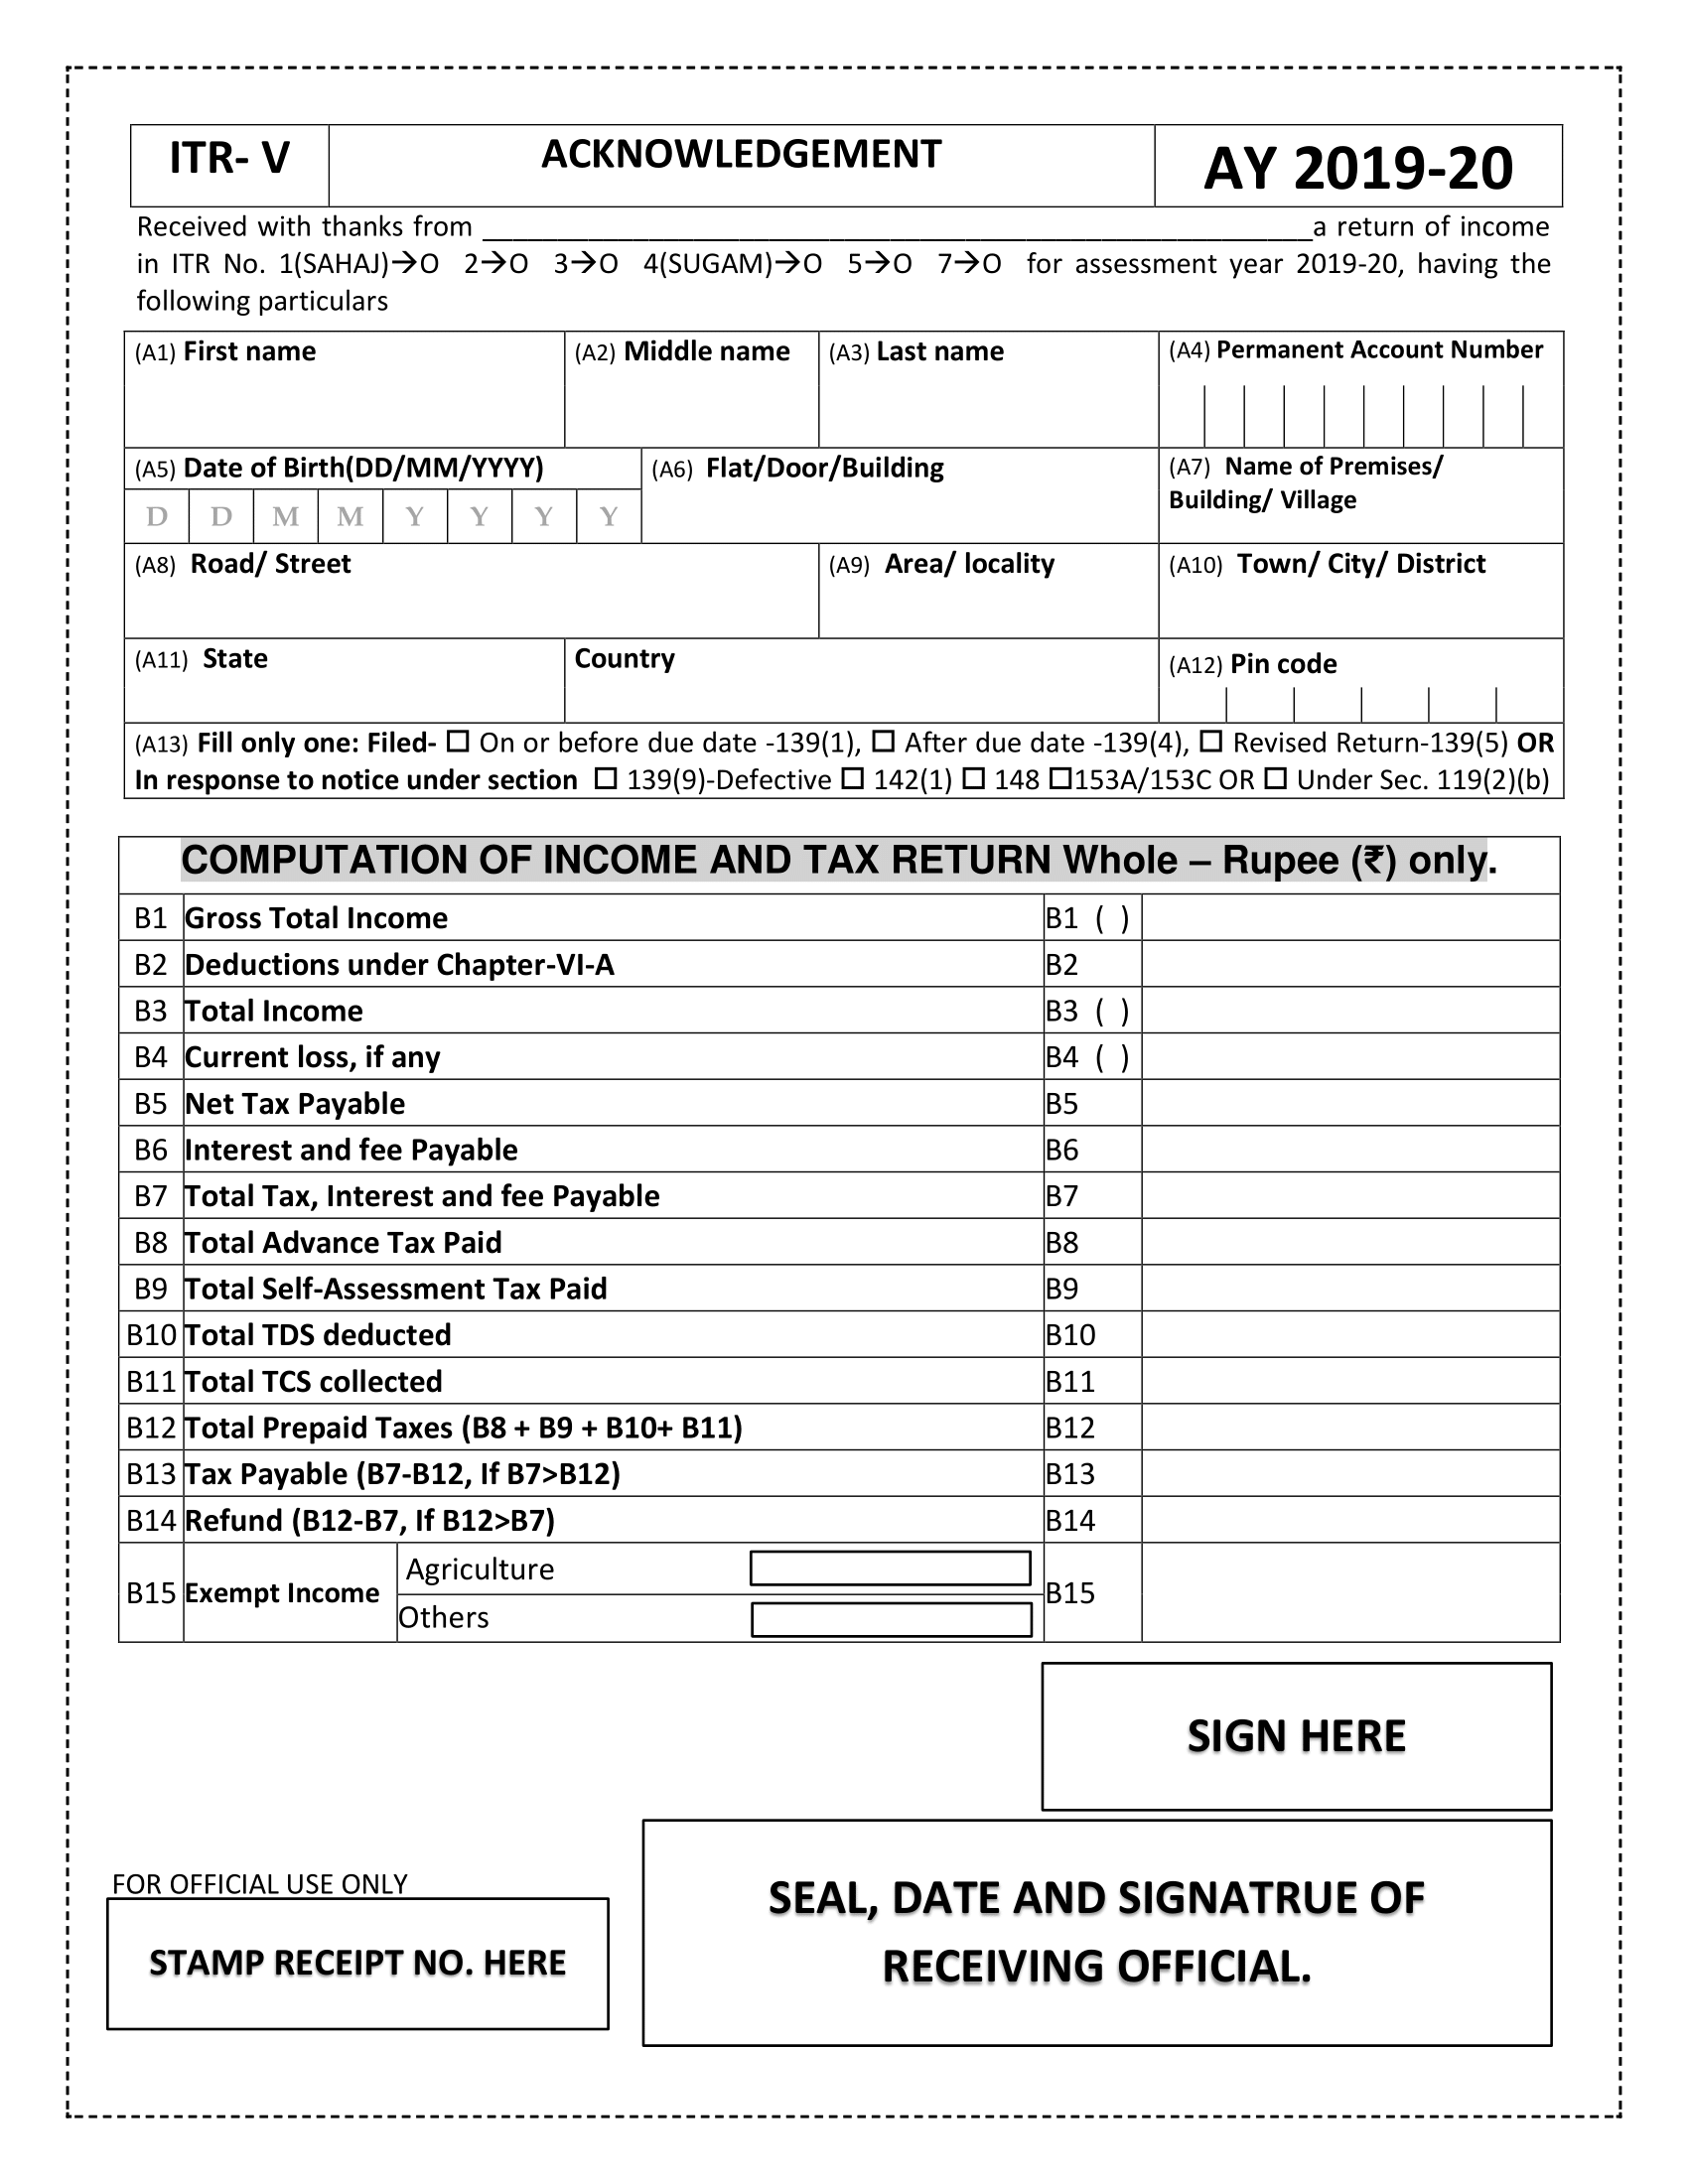
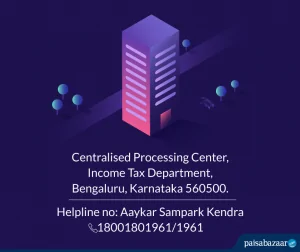
Centralised Processing Center,
Income Tax Department,
Bengaluru, Karnataka 560500
Read the detailed instructions to fill out ITR-V.“
You should verify your ITR because:
So, you must verify your ITR and hence get it validated within 120 days of filing.
Q1. What is ITR verification?
Ans. ITR verification is the process of validating the uploaded ITR. If you do not verify your ITR, the ITR will be null and void. In that case, you will have to file a belated return along with late filing penalties.
Thus, you must verify your ITR within 120 days of filing. It can be done both electronically and physically be sending ITR-V by post.
Q2. How can I verify my ITR?
Ans. ITR verification can be done in 2 ways, namely, e-verification and physical verification. e-verification can be done from the e-filing portal of the Income Tax Department while for physical verification, you will have to send a copy of ITR-V by post to CPC, Bangalore.
Step-by-Step Guide to how to e-verify ITR as well as to physically verify the ITR.
Q3. Which is the best way to verify ITR?
Ans. The best way to verify your ITR is e-verification because:
you need not send the physical copy of ITR-V to CPC, Bangalore.
Q4. How do you check if ITR is verified or not?
Ans. You can check the ITR verification status here by typing your PAN, acknowledgement number and captcha code. However, if you had verified ITR by sending a copy of ITR-V to CPC by post, then you will receive an acknowledgement email by CPC.
Q5. What happens if ITR verification is not done within 120 days of filing?
Ans. If you do not verify your ITR within 120 days of filing, your ITR will stand invalid. This would mean that you have not filed ITR for that particular FY and you will have to file a belated ITR with penalties.
However, if there was a genuine reason or hardship due to which you could not verify your ITR on time, you can file a condonation delay request from the e-filing website of IT Department.
Q6. What to do if ITR-V is rejected?
Ans. If your ITR-V is rejected, first click on the acknowledgement number. Doing this will display the reason for the rejection. For example, if the reason says that your ITR-V has been rejected because it exceeded the due date of verification, then file a revised return and verify it within 120 days of revised return filing.
NOTE: It is suggested to always e-verify your return to avoid any delay.
Must Read: Step-by-step guide to e-verify your return.
Q7. What happens after e-verification of ITR?
Ans. Once you e-verify your ITR, you should first check the ITR status. After ITR verification, your ITR will be processed and you will receive an intimation from the IT Department u/s 143(1) on completion of assessment.
Q8. How can I download ITR-V?
Ans. Following are the steps to download ITR-V:
Step 1: Visit the e-filing portal of Income Tax Department and log in.
Step 2: Select “View Returns/Forms” option to see the e-filed returns.
Step 3: Click on the acknowledgement number and select ITR-V/ Acknowledgement to download ITR-V.
Step 4: After downloading the form, enter the password to open the document. The password is your PAN in small letters along with your date of birth.
For example: if your PAN number is ABCDE12345 and your date of birth is 01/12/1985 (dd/mm/yyyy), the password will be “abcde1234501121985”.
Q9. What is EVC?
Ans. EVC refers to Electronic Verification Code. It is a 10-digit alphanumeric code, unique to every PAN. It is required for e-verification of ITR. Please note that ITR must be verified within 120 days of ITR filing. Moreover, one EVC can be used to verify only one return. Thus if you revise your return, you need to generate another EVC.
Q10. How to generate EVC or Electronic Verification Code?
Ans. EVC can be generated through:
Read detailed steps about how to generate EVC through different methods